How to configure Apache server on Ubuntu 20.04


First of all Make sure your system is up to date, To do that, type the following command
sudo apt update && sudo apt upgrade
Step 1 - Install Apache 2 server
To install apache server run the following command
sudo apt install apache2
Step 2 - Make sure Apache service starts on system boot
To check that run the following command
sudo systemctl is-enabled apache2.service
If you get Output similar to the image below then you are good to go

If your Output is not similar to the Image then run the following command to enable Apache service on boot
sudo systemctl enable apache2.service
Step 4 - Make sure your Apache server status is active
To check the status run the following command
sudo systemctl status apache2.service
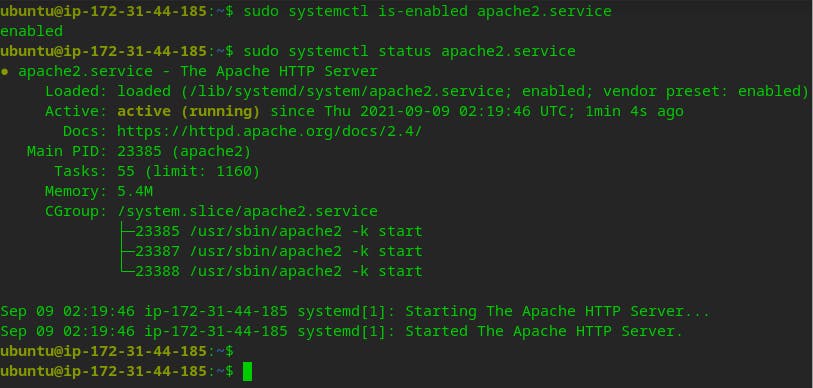 If server status is active (running) then everything is fine, up and running
Step 4 - Open Apache port 80 and 443
To open port 80 and 443 use the following commands
sudo ufw allow 80/tcp
sudo ufw allow 443/tcp
if you are Configuring a cloud server then make sure to allow ssh so that you don't get locked out of your server. Run the following command to allow SSH
sudo ufw allow openssh
Now Enable the firewall
sudo ufw enable
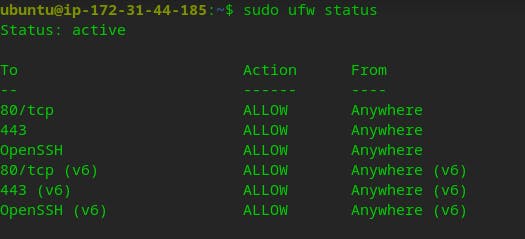
Check Status of firewall
sudo ufw status
It should look like this
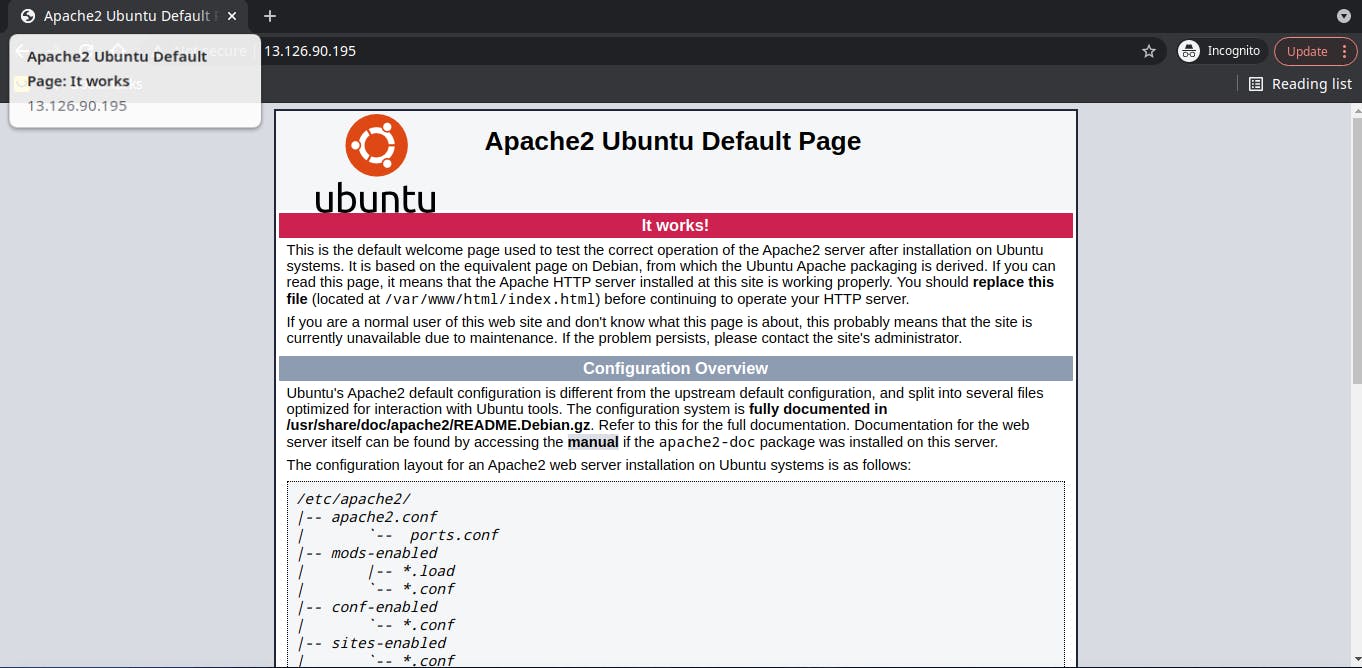
Step 5 - Test your Apache server
Test Using terminal
curl -I http://<your-server-ip-address>/

To Test Using Web-Browser, Simply type your servers ip address in the address bar,and you should get output like this